Login screen customization
2 min
You can customize your personal view of the login page.
Accessing Login Page Settings: To access the settings, navigate to the "Tenant Configuration" page and scroll down until you find the "Login Page Settings" section.
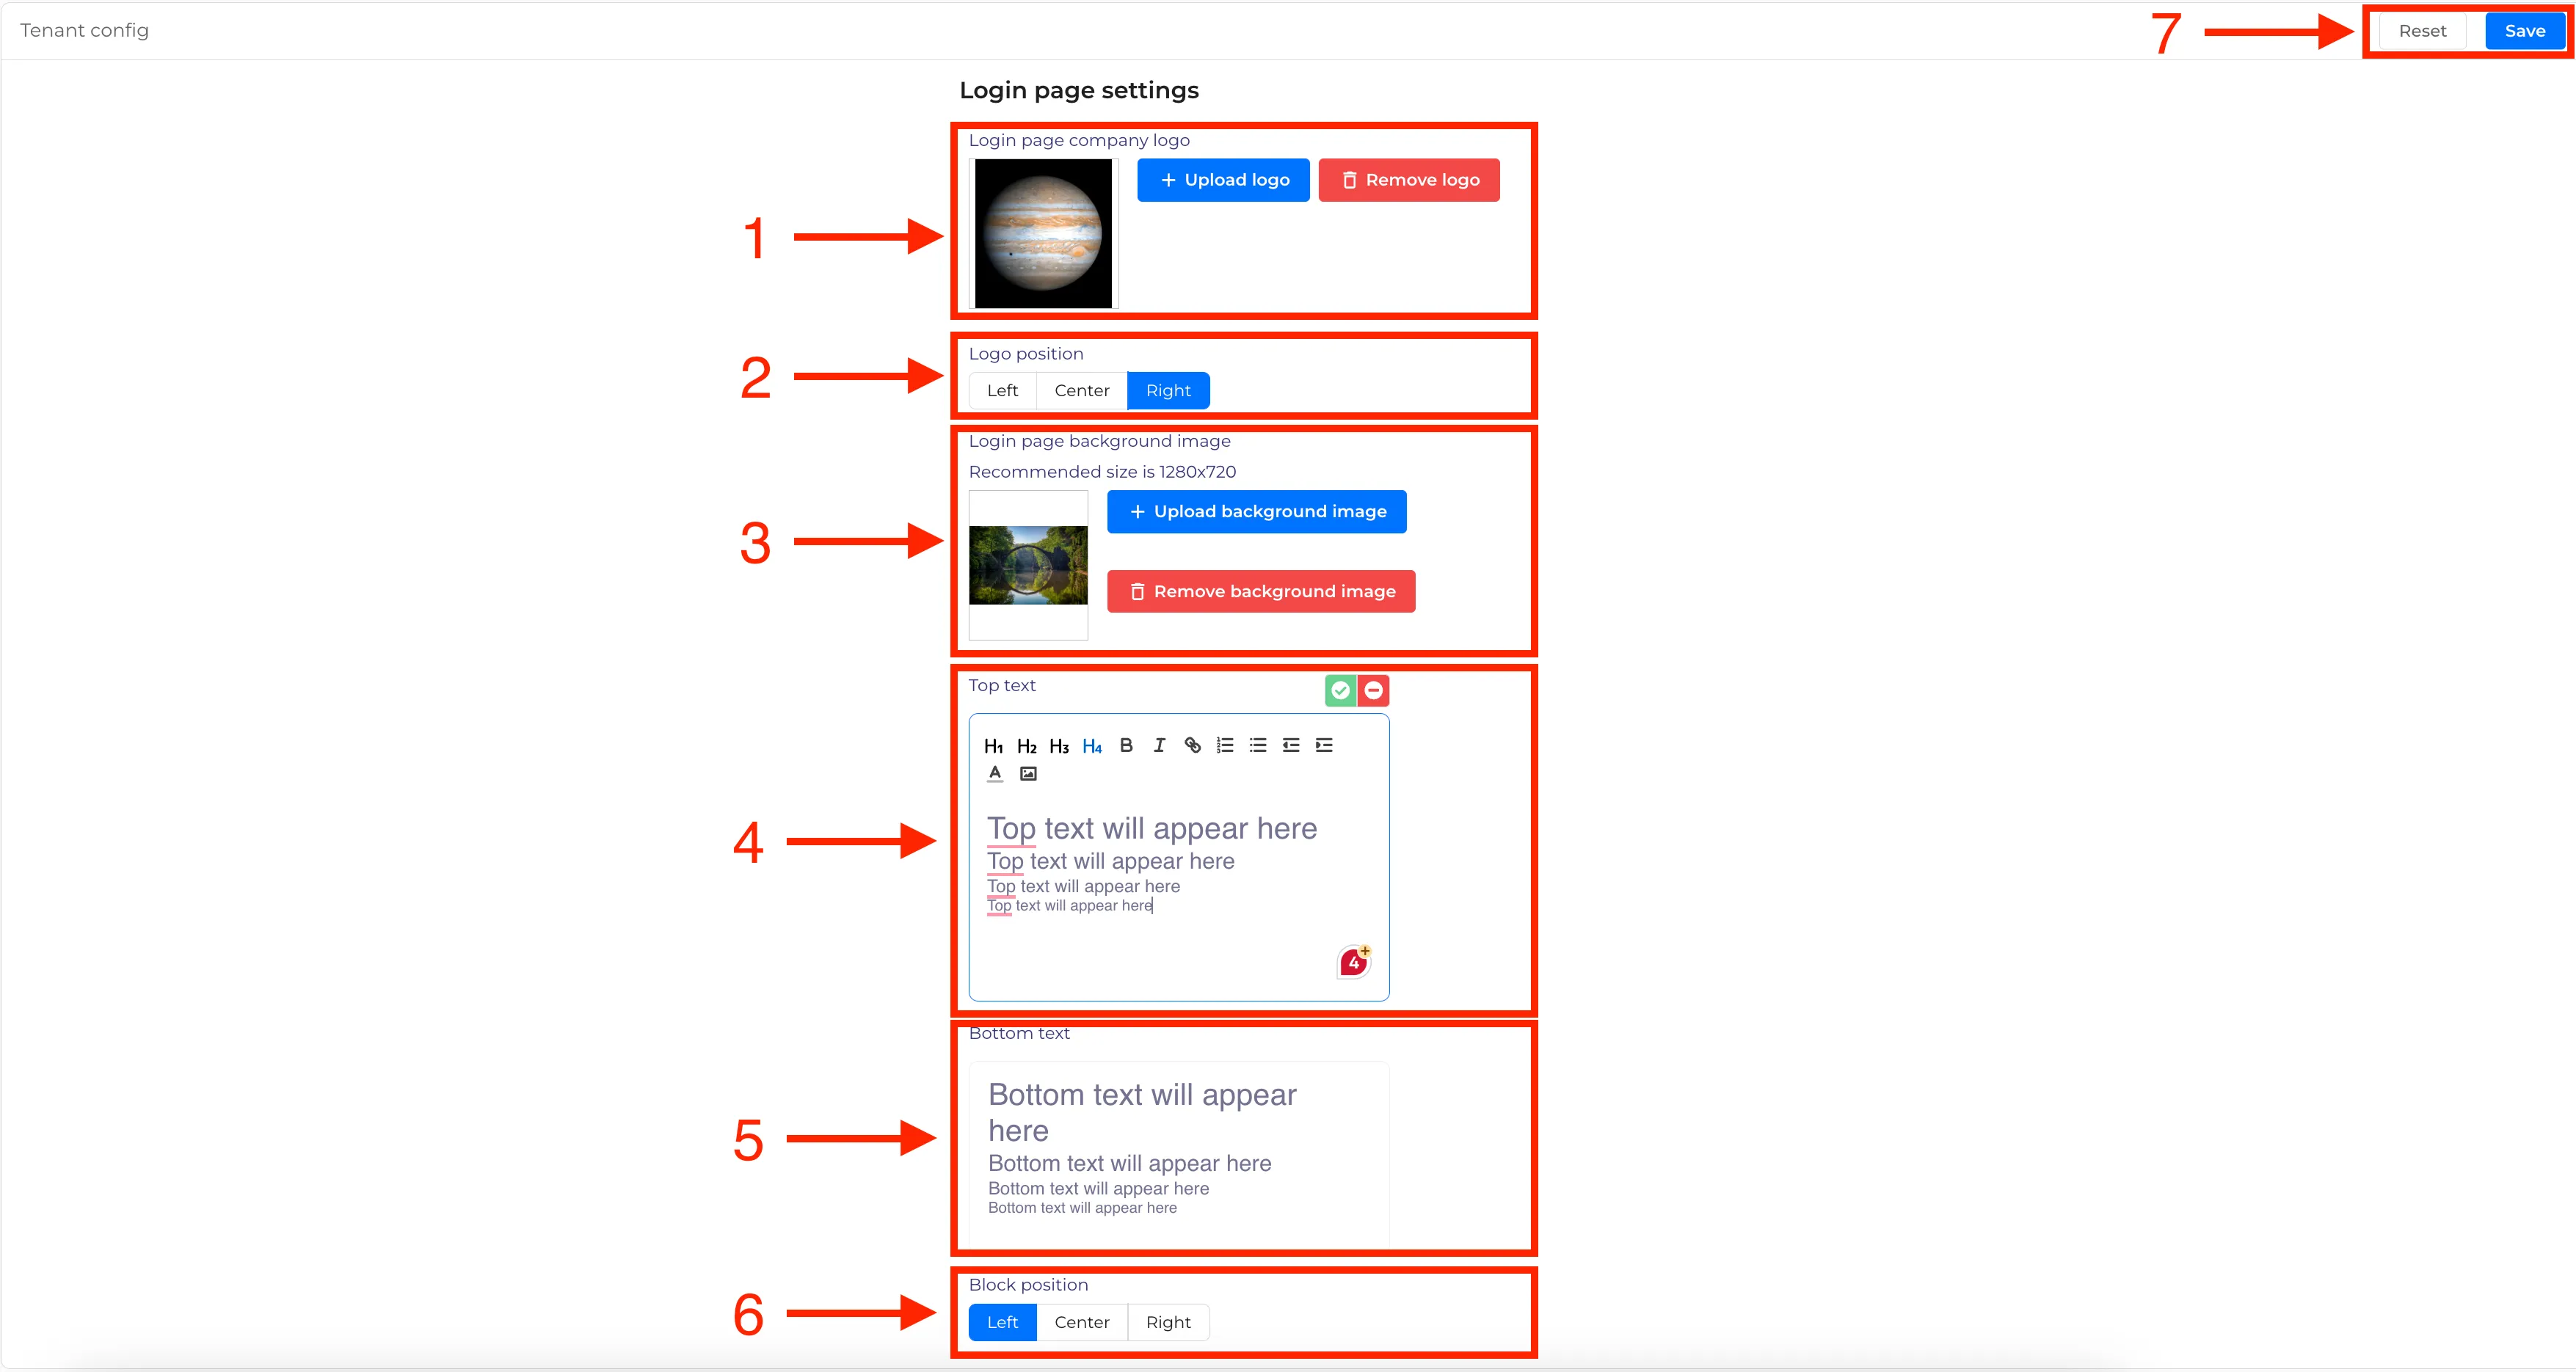
1. Login Page Company Logo (1):
- Upload your company logo to be displayed on the login page. Supported image formats include jpg, jpeg, png, tiff, ico, gif, and webp.
2. Logo position (2)
- Choose the position of the logo on the login page. Options include Left, Center, or Right alignment.
3. Login page background image (3)
- Upload an image to be set as the background of the login page. Supported image formats include jpg, jpeg, png, tiff, ico, gif, and webp.
4. Top text (4)
- This is a rich text property where you can customize text appearance, add images, and attach links. Use it to provide important information or instructions to users.
5. Bottom text (5)
- This is a rich text property allowing customization of text appearance, images, and links. It's useful for additional messages
6. Block position (6)
- Choose the position of the login block (containing the login form) on the page: Left, Center, or Right alignment.
Reset/Save buttons (7)
- Use these buttons to save your settings or reset them to default values.
Keep image file sizes below 2 MB.
The recommended resolution size for optimal display is 1280x720 pixels.
View on the login page:
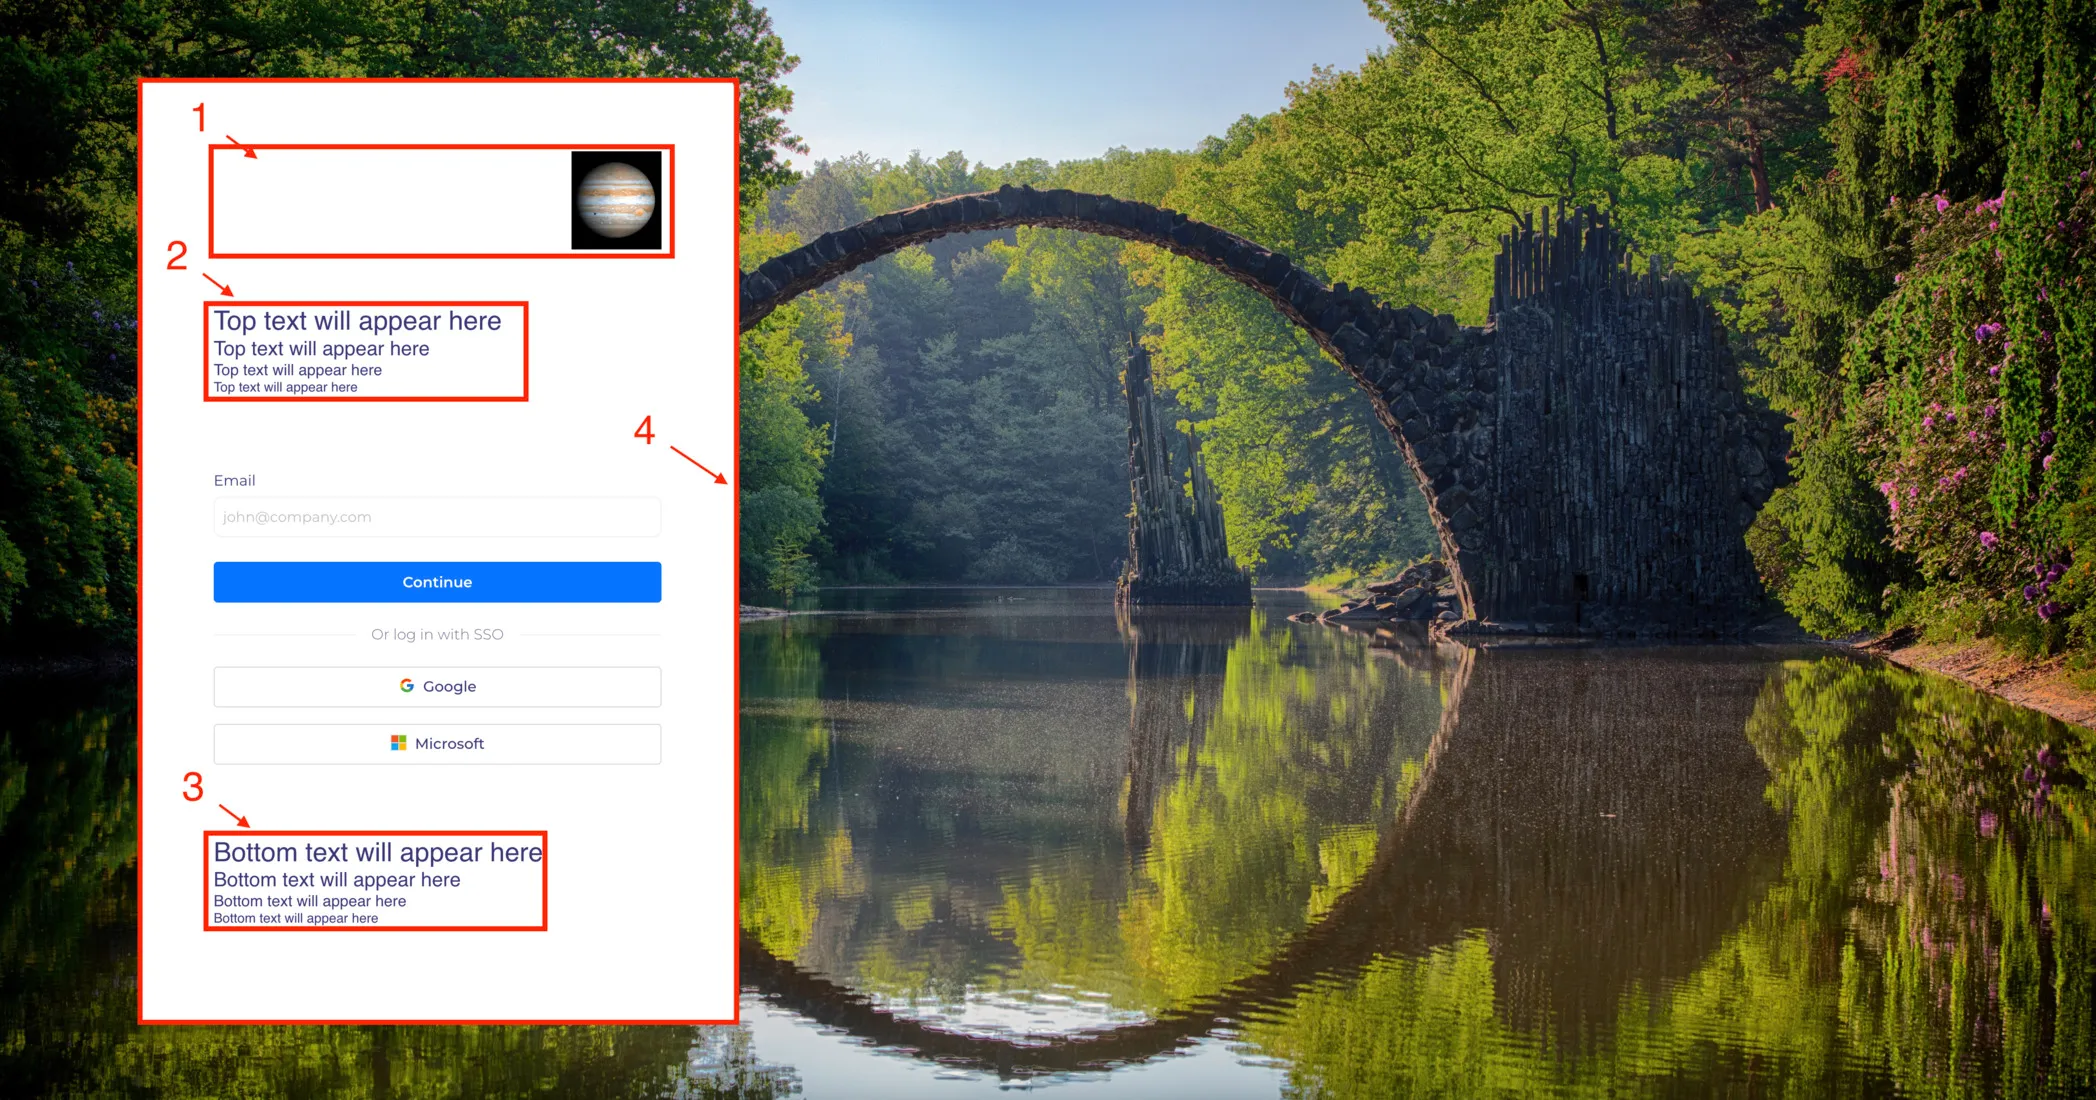
- Logo position (1) This option enables you to select the position of your logo on the login page. Choose from Left, Center, or Right alignment to best suit your layout preferences
- Top text (2) Add customized text to be displayed between the logo and the email input field
- Bottom text (3) customize text content to be displayed at the very bottom of the login block.
- Block position (4) Determine the alignment of the login block within the background. Choose between Left, Center, or Right positioning options to ensure optimal visual presentation and layout cohesion.