Conditional Formatting
Conditional formatting - is a feature that helps to emphasize and highlight the needed data or information while working with entities.
To carry out a conditional formatting function a user should:
- Open CMS;
2. Choose the needed Entity;
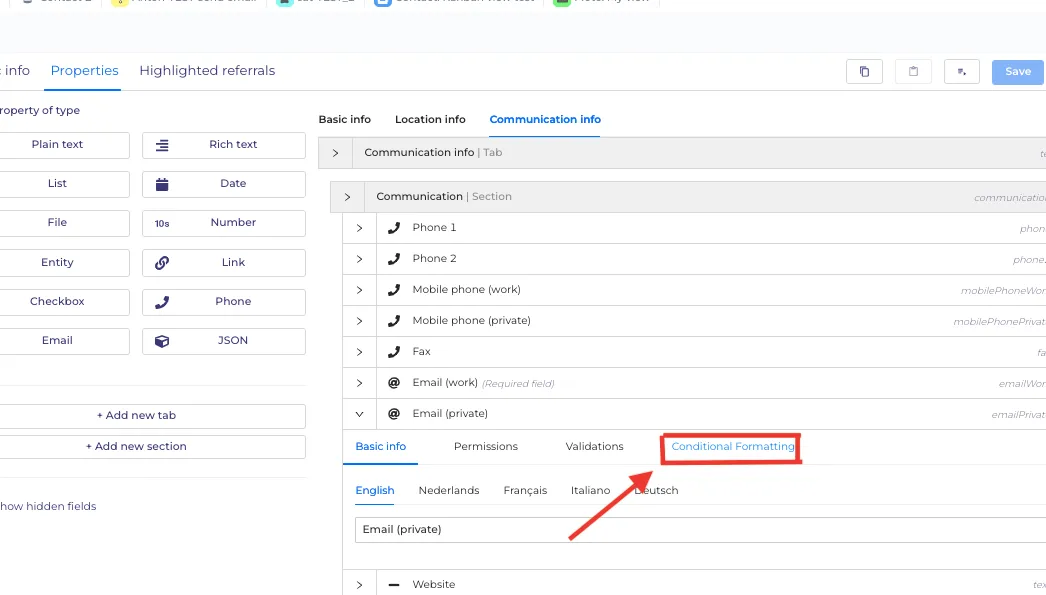
3. Click on the Properties button;
4. Select the required Property in it.

After the selection of the needed Property, click on "Conditional Formatting" button.
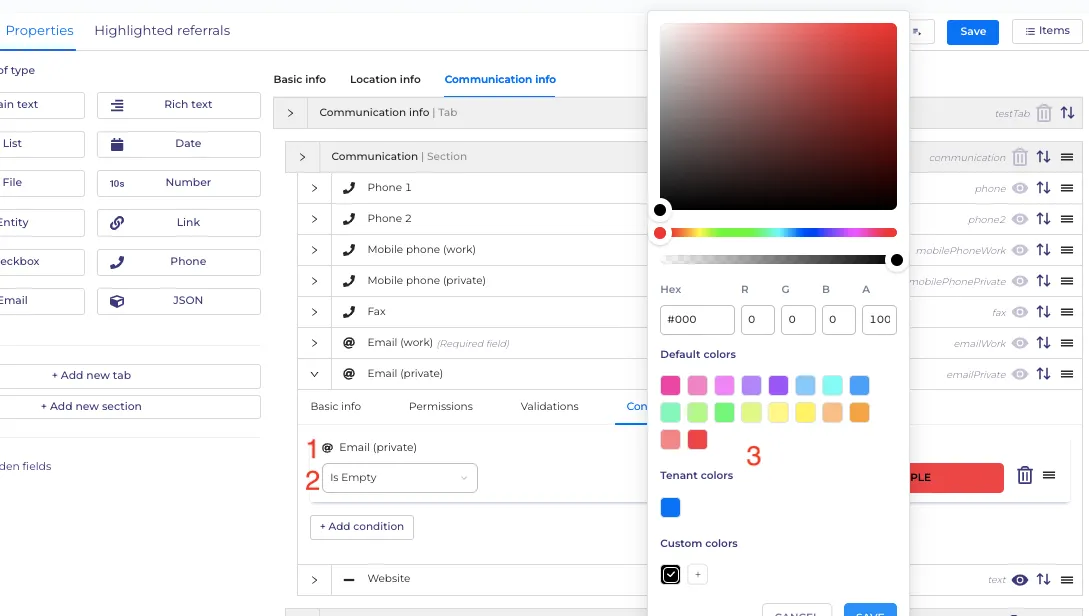
In the above shown illustration there are following components:
1. The required Property (Here, it is e-mail private);
2. The status of Property ( Here, is Empty);
3. The color which a user selects for this certain status before saving it.
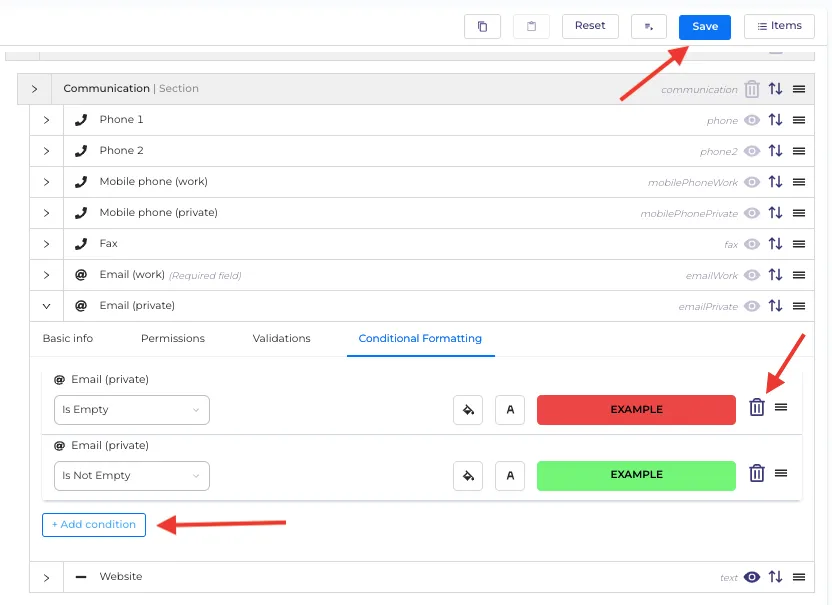
As it is shown on the picture above, a user can add several conditions by clicking the "+Add condition button" and giving it a status (Is Empty, Is Not Empty, etc.). A user can delete the conditions whenever needed and move the Property as any other Property higher or lower. After the set up it is essential to click the "Save" button to keep the changes that were made.
It's worth noting that conditional formatting works on the first successful match principle. If you create multiple similar rules, only the first one will be triggered. For example: Value - Pina Colada Condition 1 (green background) - value contains pin Condition 2 (yellow background) - value contains pina Condition 3 (blue background) - value contains cola Condition 4 (red background) - value contains pina colada The UI will display the property with a green background
Also, be careful: if you create multiple rules that include checks for: whether a value is present; whether a value is absent; or whether a specific value is present; the is empty and is not empty operators should be first in line. Otherwise, you might check for a specific value, which will be equivalent to the absence of a value. For example: Checkbox property type Value - absent, but previously it was (it was true-false and was reset by setting the value to null) Condition 1 (green background) - if the value is true (yes) Condition 2 (red background) - if the value is false (no) Condition 3 (white background) - if there is no value (null) In this case, the absence of a value will be considered the second rule, not the third. To solve this problem, rule 3 should be first in line. Previously - true, false, is empty Replace with - is empty, true, false
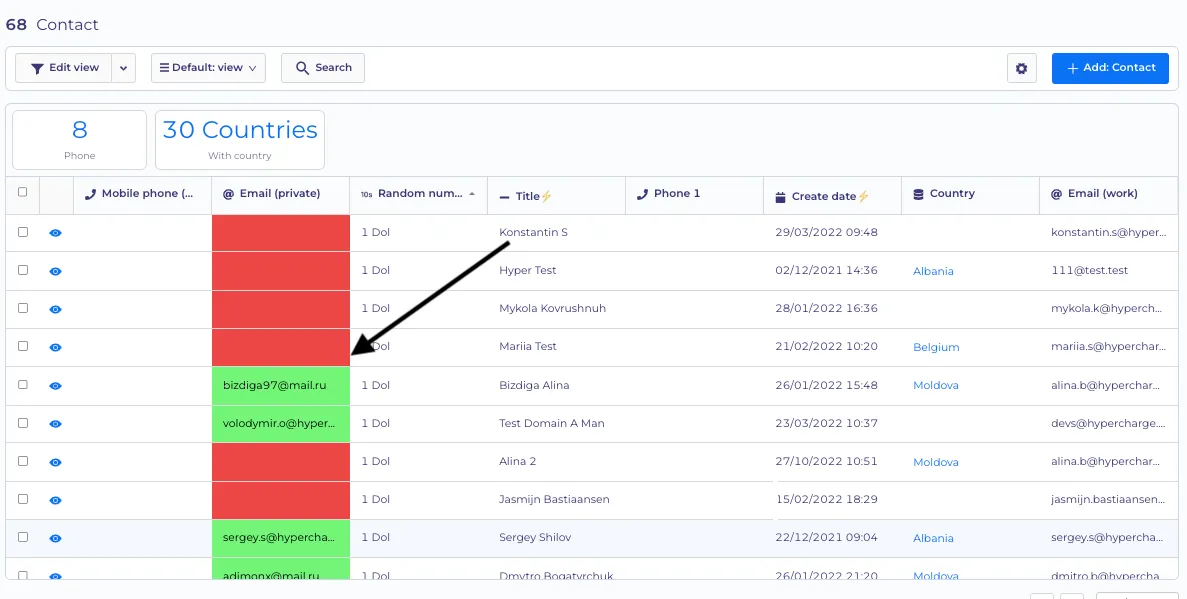
In the picture above it is clearly shown that empty e-mails are colored in red and filled-in e-mails are colored in green.
So let's examine another example of the specific task. We need visually to differentiate the process status of the sent mailing campaign - stop, cancelled, failed, running, succeeded.
First, we follow the path CMS --> Workflows --> process status --> ⚙️ (gear symbol) --> Properties
Then we select Property "Tiltles".
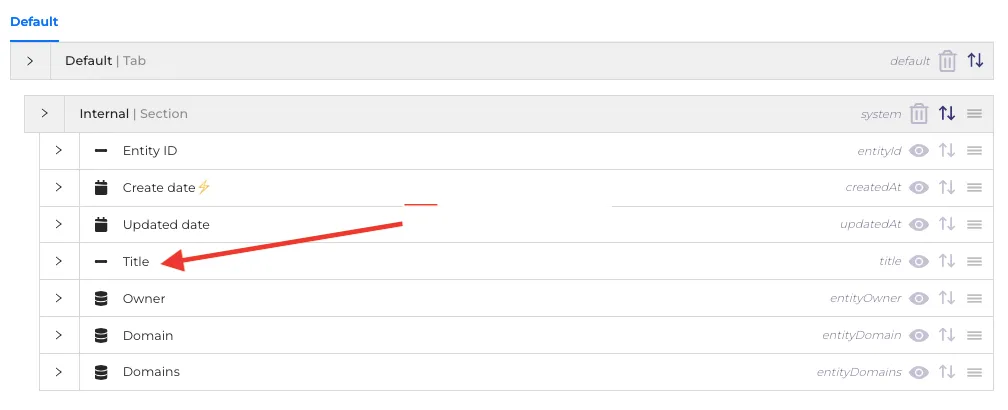
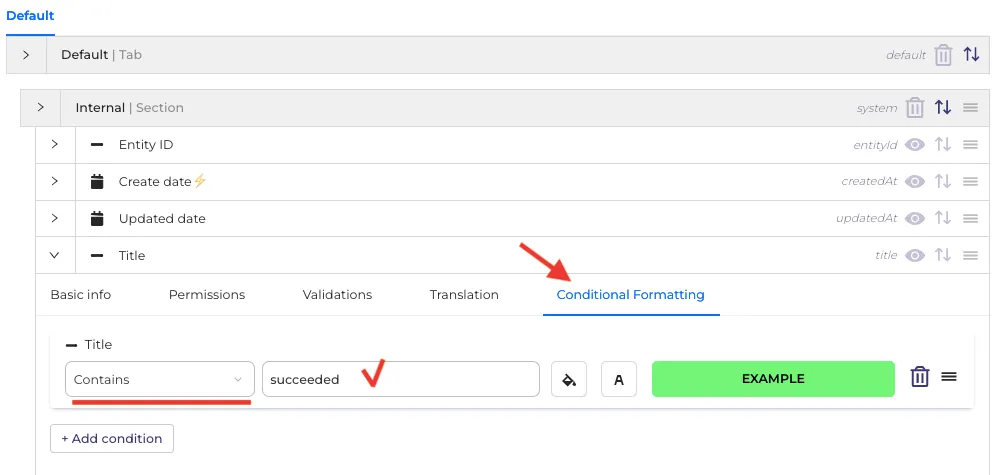
After that we click on "Conditional Formatting", select "contains" ("Is" is also suitable in this case), choose a status "Succedeed" and assign green color.
If we go back to CMS -->Workflows > process status, we see that "Succeeded" is already has a green highlighted status.
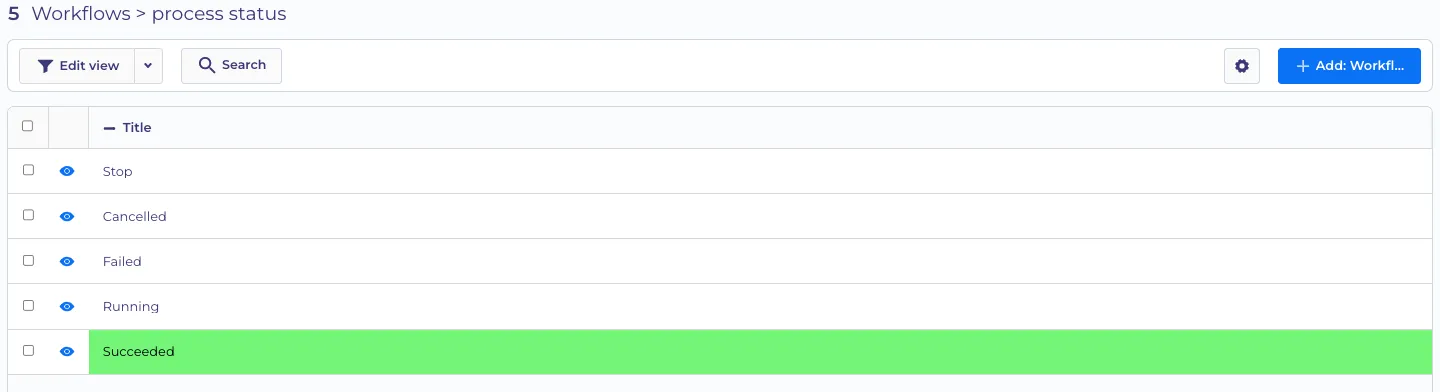
So we need to give the color to each of remaining statuses - stop, cancelled, failed, running as is described above.
To check the results we go to Workfow --> Proceses --> and select any process.
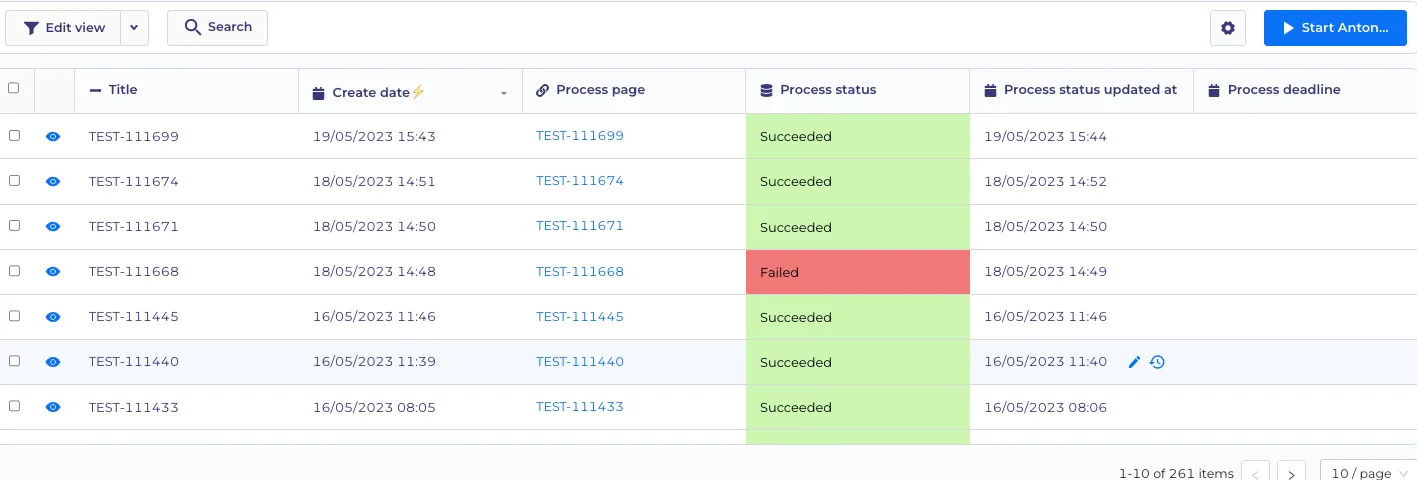
As we can see it has worked correctly.